A couple of days ago a very close friend of mine committed a terrible mistake: He formatted all of his drive when he was trying to install Linux. Soon he was consumed by despair as the installation failed and he was left with no operating system and just an empty option in the boot menu labeled “Windows 7”, a misleading entry merely pointing out to Windows’s 100 MB recovery partition. Not a single personal file survived, all of his music, documents and pictures were now lost.
In his desperation he booted into Linux again using his live CD and more time tried to install it, this time he succeeded. Little he knew that he was just making things worse.
But despite all mistakes and all suffering we recovered every single one of the files he wanted to recover, today he’s using Linux exclusively, as he intended anyway, so only Windows was lost.
By the end of this article things might get scary, as you will soon realize that formatting and deleting stuff from your drive is hardly a guarantee that nobody will ever get to them.
Note: This article is about recovering files when you can no longer get your old partition back and it only applies if you have a healthy hard drive. You can still get your partitions back after formatting it if you have not written anything on it, if you have a hardware failure you need to use a different method, I will write about those cases later this week.
Getting your files back
Step 1, Stay frosty. Don’t panic. Even if you formatted and installed an operating system on top of where your old files were we can still recover most of them, if not all of them and then some. Boot from a Live CD or Live USB.
Step 2, find a hard drive to save the files we’re about to recover. If you don’t have one, and you can’t wait until you do, you may create a partition in the last segments of your hard drive to store the files you intend to recover.
Step 3, get the right software. There are many tools designed to recover lost files, in my experience the best two are Foremost and Photorec, specially the latter. Installing them in Netrunner is as easy as running:
sudo apt-get install foremost testdisk
Step 4, using Foremost. Foremost is a command line application originally developed by the Air Force Office of Special Investigations and The Center for Information Systems Security Studies and Research. Using it is relatively easy, you just need to specify the drive (or image) you want to scan and where you want to store the files it recovers, bare in mind that it can only be run as root and that the recovered files will only be visible to the root:
sudo foremost -i /where-to-scan -o /where-to-store-saved-files
You can also specify which file types you want to recover, for example:
sudo foremost -i /dev/sda1 -o /media/recover -t jpg
Will scan /dev/sda1 for jpg images and store any recovered files in /media/recover. As I mentioned recovered files can only be seen and edited by the root, to change this just run:
sudo chown -R youruser:youruser /where-you-stored-your-files
Step 5. using Photorec. Photorec is part of testdisk, a very powerful tool when things go south, even more impressive is how user friendly it is, at least for a tool of this nature. To start using it run:
sudo photorec
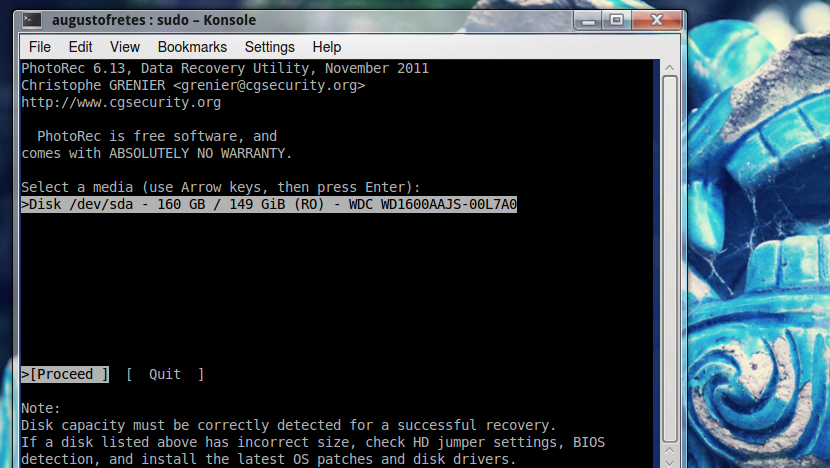
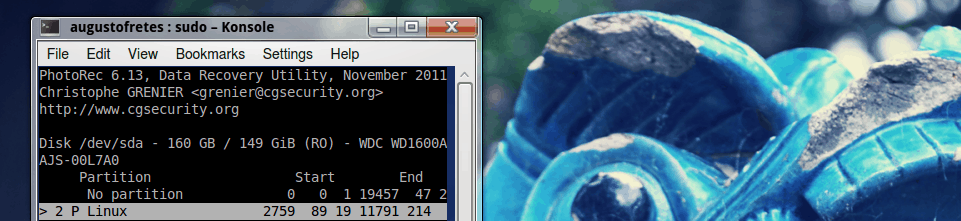
First you need to pick the hard drive you want to recover files from. Thanks to its very nice Command Line Interface (CLI) you just need to navigate to the right option using the arrow keys:
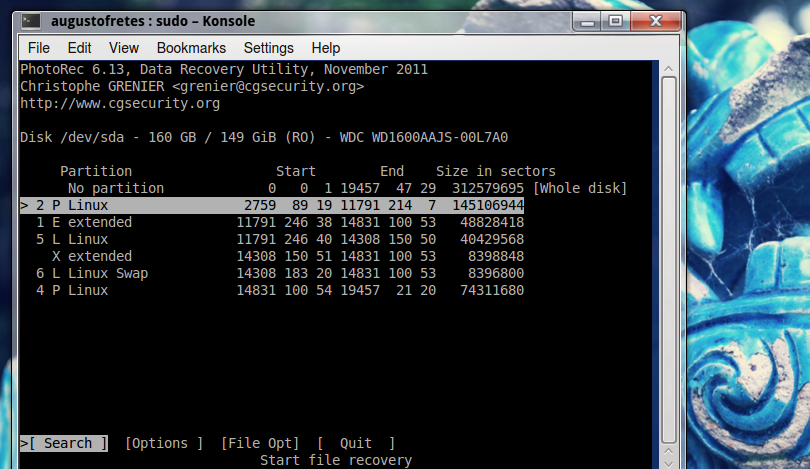
Then you need to pick the partition you want to scan (or the whole drive, if that’s the case), again you just need to select it using the navigational keys:
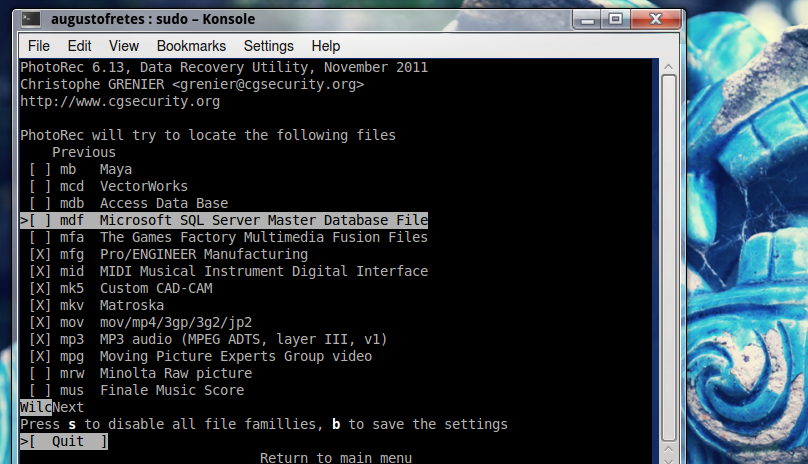
You can also select which file types you want to scan for, Photorec supports a bunch of different types, quite a lot more than foremost actually, just select File Opt and enable/disable any file type by using the arrow keys, press s to disable all:
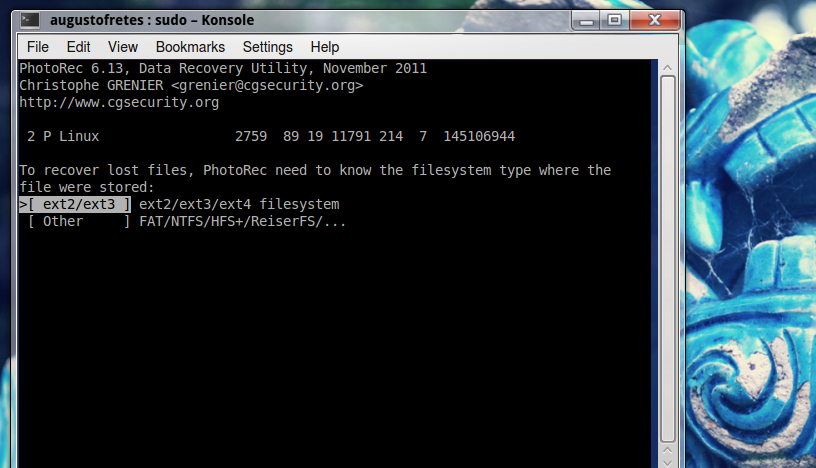
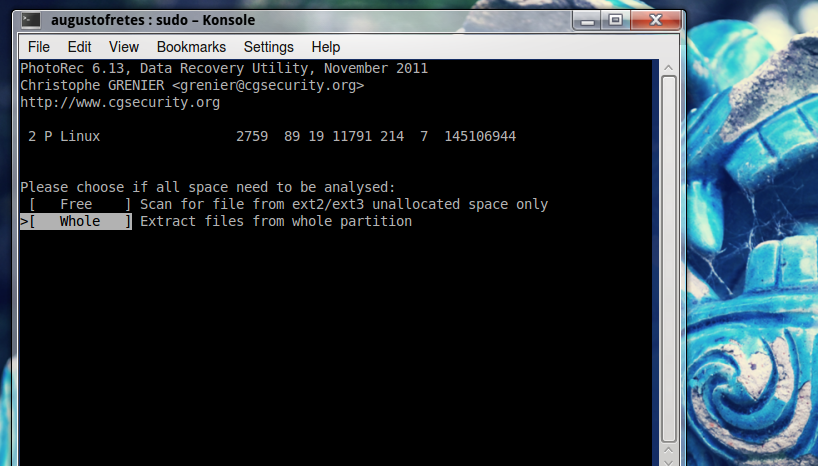
Select the format in which the files you intend to recover were originally stored (not the current format of the drive):
Choose to analyse the entire partition:
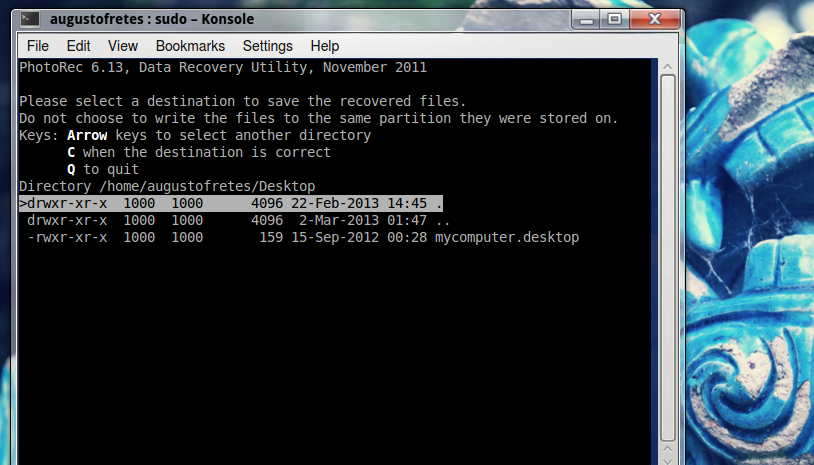
At last, just select where you want to store your recovered files, once you open a folder to select it as the destination pick the first option and press c, to go back pick the second and press enter:
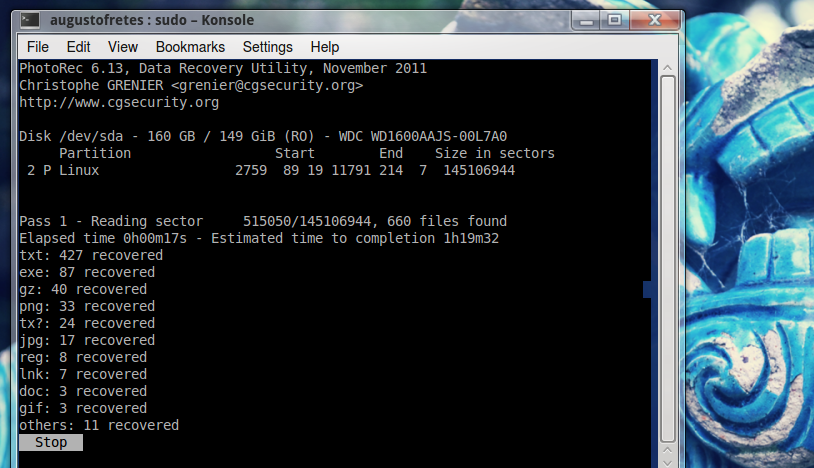
Now you only need to sit down and be very patient. In my experience Photorec is usually better than what people expect, it can even freak them out.
I hope you find this guide useful. By the way, you can use this same exact method in any drive, including drives formatted in FAT, so you can recover files from micro-SD cards, USB drives, among others. So the next time you encounter with an issue of this nature, just remain calm and know that most of your data can be recovered.
[sharedaddy]

I always hold my data on a data partition of my disk, so if I have problems with the OS I’m using or I just want to change distro, I can always access them