Most graphics editors have a stamp or clone feature that allow you to repeat the same pattern with a click of the mouse. Krita is no exception. However, as often happens, Krita has a logic of its own, and in this case the feature is hidden among the characteristics of brushes.
In 2.9, the latest release, it is specified as being a selection for the brush tip, the part of the brush that comes directly in contact with the canvas. For sketching or painting, the brush tip is typically a circle or rectangle, sometimes with modifications, but you can make a custom brush tip for a brush that is a stamp in three ways: from text, from a selection in the current document, or from the contents of a clipboard.
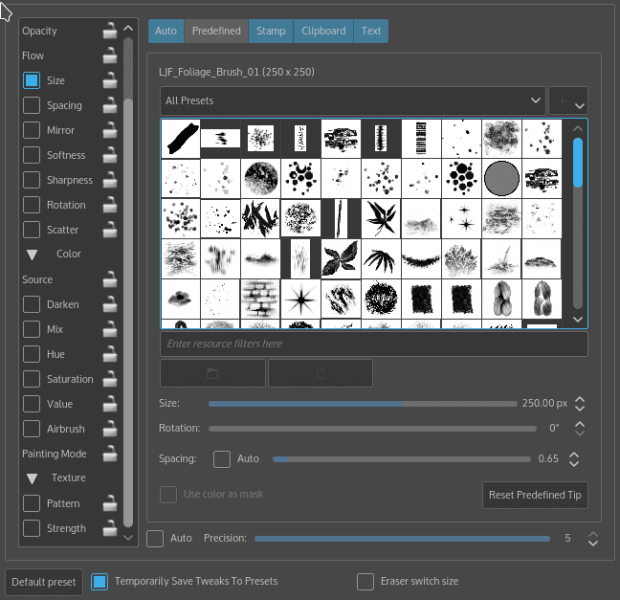
Krita installs with dozens of what I call stamp brushes since I have been unable to find an existing name for them. In fact, I suspect that the lack of name might be a deliberate attempt to reduce jargon and unify the concept of brushes in general. These brushes are listed under Edit brush settings > Predefined with the other brush tips, where each can be sized, rotated, and spaced, and tried out in the blank pane on the right of the window.
However, in many cases, you might want a custom stamp brush or two. For instance, you may wanto to create a stamp with your signature, or with a company logo. More elaborately, you could develop stamp brushes for symbols on a map, or for filling in a background of trees to save yourself brush strokes in a painting.
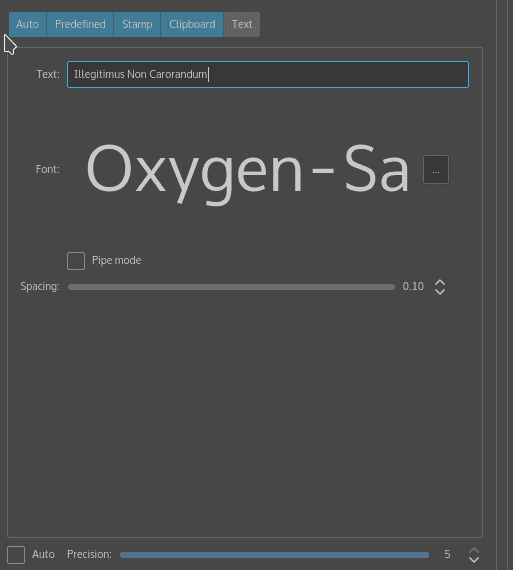
The simplest stamp brush is based on a single line of text. Go to the Text tab in Edit brush settings, enter the text and set its font and spacing, and you can apply the text to the canvas by clicking the mouse. If you use a dingbat font, in which the letters are replaced by simple images, you can suddenly have several dozen images to choose from.
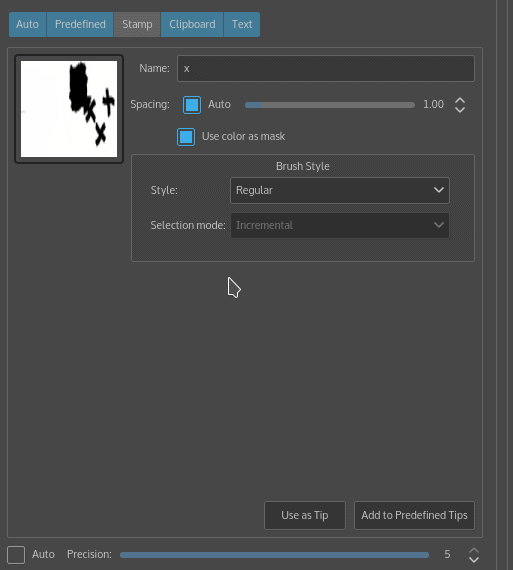
By contrast, if you go to the Stamp tab, the contents of the current document becomes the stamp. However, the result is often unwieldy, so you will probably want to use only a selection of the document instead. The contents or selection displays in the preview, and you can name and customize the stamp.
A brush from the clipboard works in a similar fashion, except that it is created on the Clipboard tab. It is useful for importing material for stamps from other applications. Clipboard stamps are also a useful way to import images, since Krita is a KDE application, and has access to Klipper, KDE’s multiple clipboard.
You can add all three kinds of custom stamp brush tips Krita’s pre-sets for the rest of the present session by selecting Temporarily Save Tweaks into PreSets. You can also set stamps from the current document for immediate use with Use as Tip. Both stamps from the current document and from the clipboard can also be selected for Add to Predefined Tips, making them available with any brush.
All brush tips, whether stamps or not, have at least a couple of dozen of other settings, but only a few settings are essentially for creating a stamp brush. However, if you want to start somewhere in your understanding of brushes, stamp brushes are a better place than most because they are easy to learn, and can reduce much of the repetition of developing a canvas.
Cover Photo: Pictures by Claudio Bianchi for Pixabay.com
[sharedaddy]


