The Kdenlive video editor is simple for beginners, but also powerful enough for those that need to go that extra mile. Distributed under a Free Software license, it is available for GNU/Linux, MacOS X, and as a live DVD for Windows users.
Kdenlive is a non-linear video editor. This means you can do quite a bit more than just daisy-chain clips one after another. With Kdenlive, you have a series of tracks, some for video, others for audio (see the picture below). You place your clips on those, moving them around, cutting them and inserting effects and transitions from one to another. When you are done, you “render” the result and out of the other end pops your fully edited movie.
The Interface
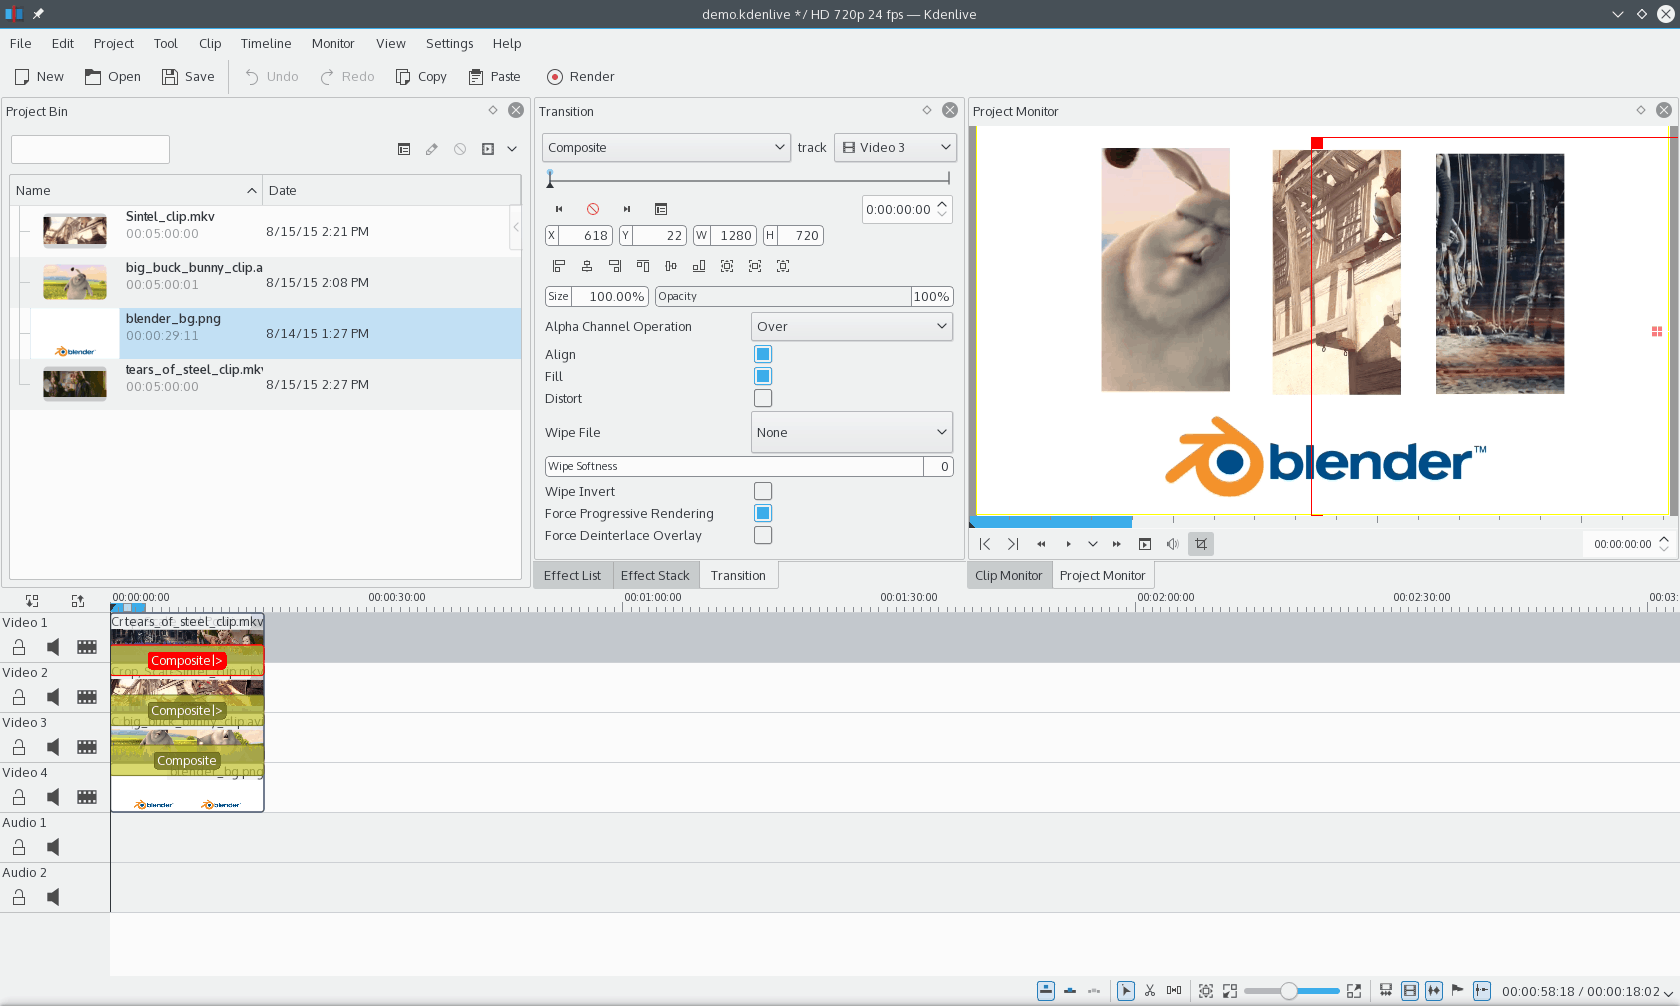
The interface is cleanly laid out, with the editor itself occupying the space at the bottom.
At the top we have a menu bar, and below that, a toolbar containing icons linked to commonly-used utilities. As we move down, we have two large sections, top and bottom. The top section is divided into 3 panes, from left to right: the Project Bin, which is where you store your base audio and video clips; the Transitions/Effects pane shows what effects and transitions are applied to each clip and their settings; finally you have the Clip/Project Monitor that shows you what an independent clip or the overall project looks like, depending on the tab you choose.
Below that, you have the editor proper. You can drag and drop video clips and audio clips onto the tracks, cut them using the scissors tool (pick it from the toolbar at the bottom right of the editor), move them around with the arrow tool, and so on.
Media
Let’s bring some media in and see how things really work. To learn Kdenlive’s ropes, if you haven’t got any clips of your own, you can grab some of the movies put out by the Blender Foundation, say, Big Buck Bunny, Sintel and, my personal favourite, Tears of Steel. These films are all published under a liberally free license, so you can use them for your experiments and even publish the results without fear of infringing someone’s copyright. I downloaded the 720p versions of each movie so all of their resolutions were the same.
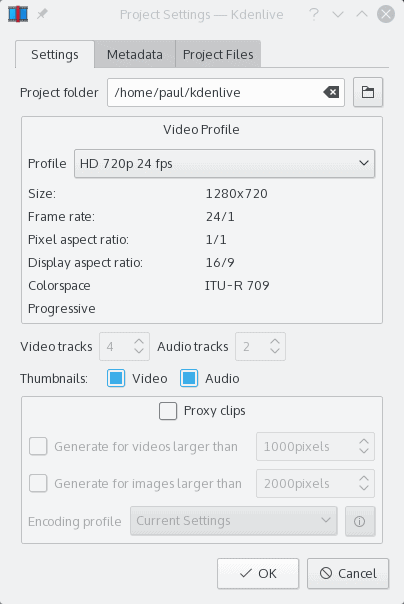
Before bringing in your clips, set up your profile.
Before you load your clips into Kdenlive, set the Profile. Click on Project and then Project Settings in the menu. Kdenlive will open a dialog for you. Choose a profile with the same format (resolution and framerate) you want for your final movie. The clips you use to build your movie should also have a similar format, so, if you are using the clips suggested above, a profile with a 720p screen size and 24 fps (frames per second) is a good choice. This is also plenty good for YouTube videos: it’s a nice high-ish resolution, but not too heavy on the megs. Of course, Kdenlive offers many more formats, from old, lo-res VGA resolutions, all the way up to 4K, and everything in between.
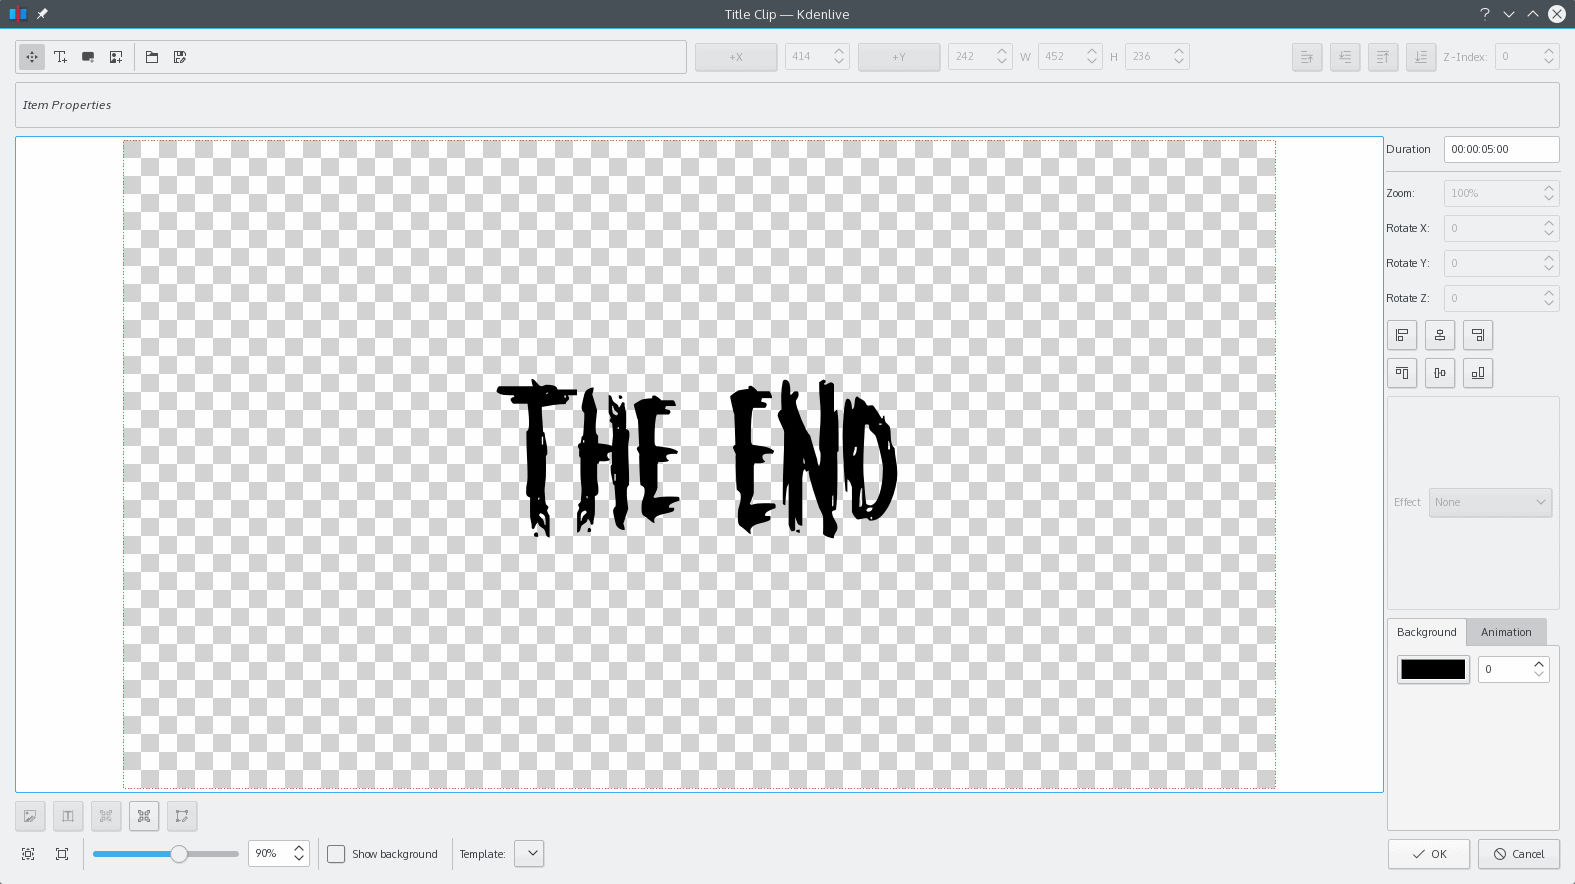
The Project Bin allows you to create titles directly in Kdenlive.
Once you have picked the resolution for your project, you can load your clips. You can do this or by dragging and dropping files from your file manager into the Project Bin, or by clicking on the little movie icon in the Project Bin’s toolbar and navigating to the files you need.
If you use the little arrow pointing down next to the movie icon, you can also load audio clips (e.g.: music for the soundtrack of your video), still images (JPEGs, PNGs, etc.), and sequences of images Kdenlive can use to build slideshows automatically for you. The menu also has options that allow you to create frames with a solid colour and titles right within Kdenlive.
Editing
Now you have your assets, you can start the editing proper. The easiest way to get started is to simply drag clips and other assets to the tracks in the editor. But, if you only want part of the clip, it may be smarter to use the Clip Monitor to pick what you need.
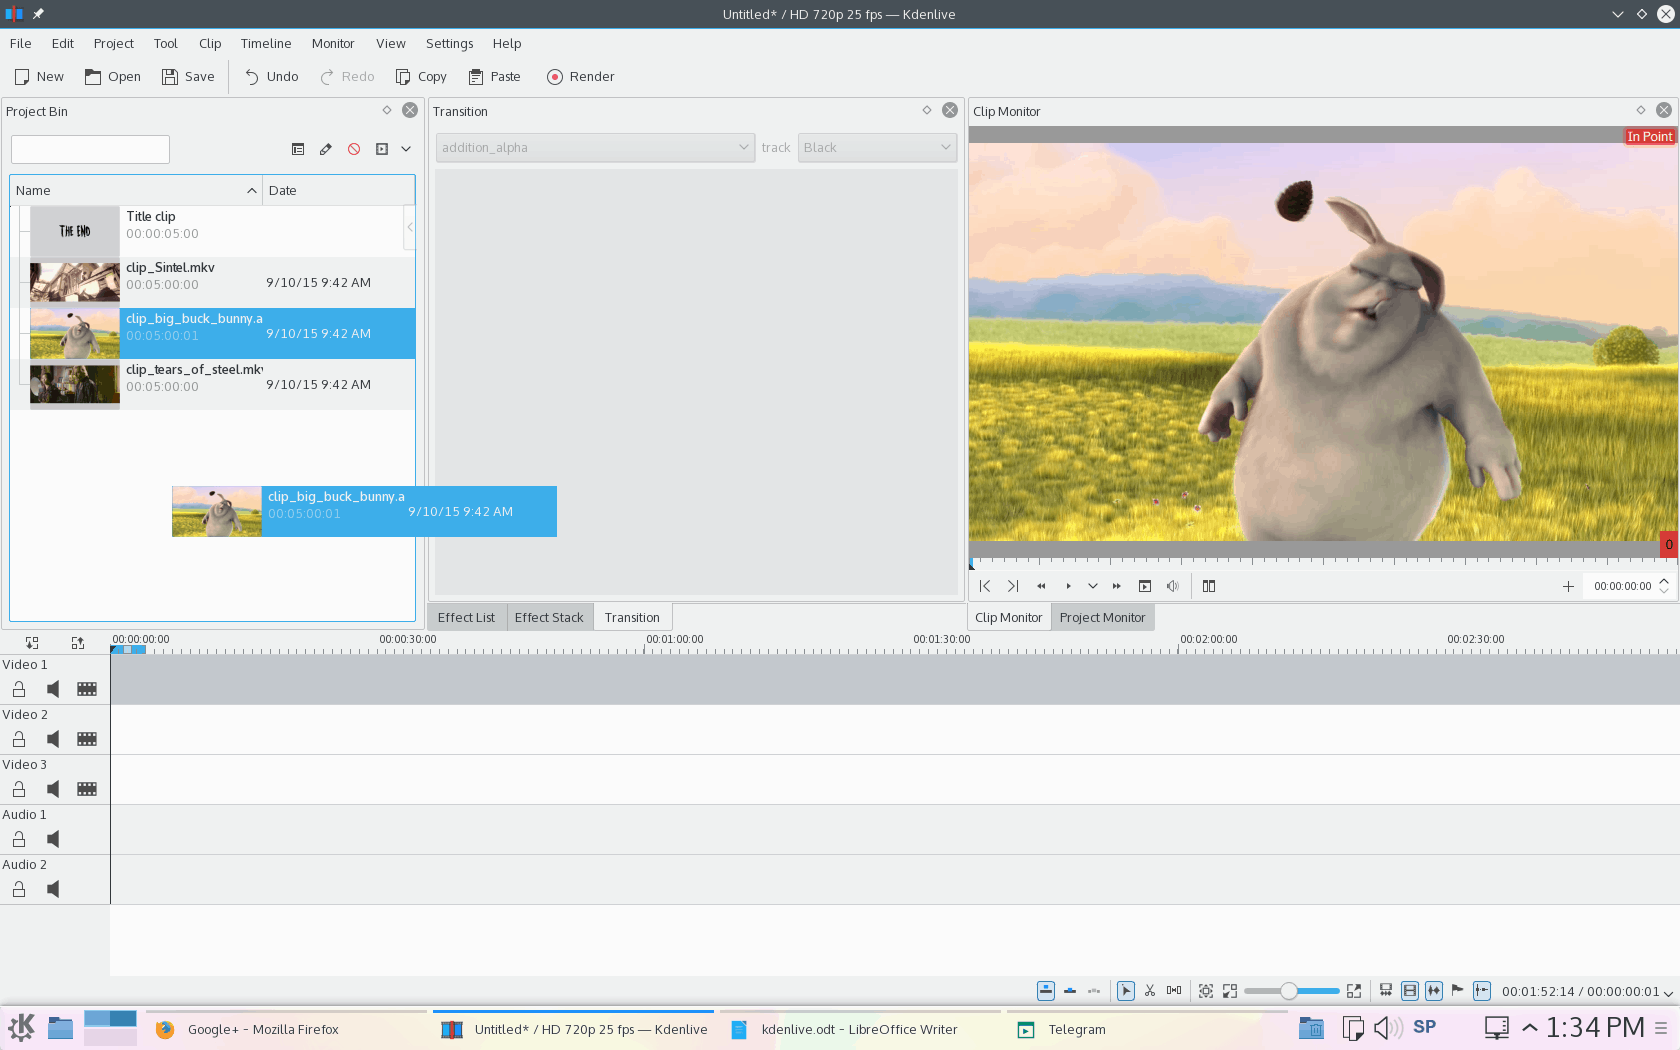
Dragging assets to the editor will work, but you may want to clip them first.
You do this by selecting the clip in the Project bin and clicking on the Clip Monitor tab in the Clip/Project Monitor panel. Below where the clip is shown, you’ll see a timeline with an arrow. Move the arrow to the beginning of the section you need (you can use the play, fast forward/back controls under the timeline for this too) and click on the Set zone start button (it looks this: |<). Then move the arrow to the end of the section you need and click Set zone end (>|). The selected area will show up as a blue segment on the timeline. To move the select area to your editor, click on the viewer in the monitor and drag it unto a free space on a track.
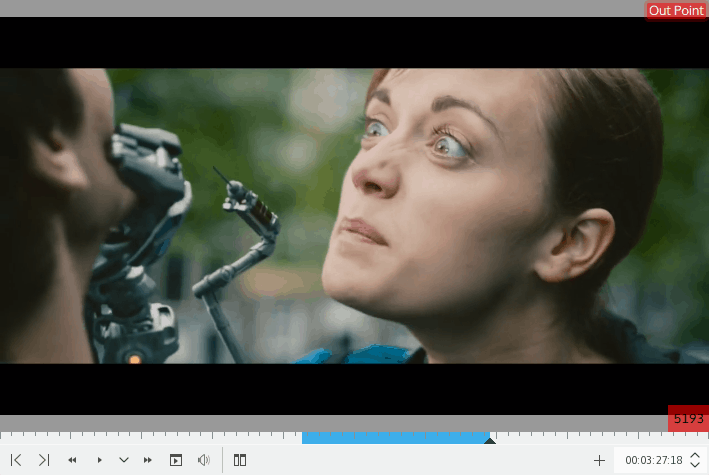
Select a region to drag to your editor.
Note that just because you selected a region from your clip, it doesn’t mean the rest of the film has disappeared from the segment. Hover your cursor over the beginning or end of the clip you just cut and a pulsating green triangle will appear. Click and drag and you can make the selection longer or shorter.
If you need to separate the audio from a video clip to, say, get rid of it, right click on the clip, choose “Split audio” and the audio will show up as a separate asset on an audio track. However, both video and audio are still grouped together (yes, you can group assets in the Kdenlive editor just the way you can group shapes in Inkscape). To separate them, select one of the clips in the group, right click and select “Ungroup Clips”. Now you can get rid of the audio clip altogether by clicking on it and hitting [Delete]. You may have to do all this process twice if the video clip has more than one audio track, i.e. is in stereo.
Effects
Effects are applied to single clips, be them video or audio. You can apply an effect by right clicking on a clip and selecting Add Effect. Effects are non-destructive and stackable. This means you can pile them on one after the other in the Effect Stack tab and activate and de-activate them, and add more or delete them at any moment without affecting the underlying film. Although you can see the effects in the project monitor, they are not really applied until you render the film.
Some effects are simple, in that they affect the whole clip in equal measure. Take the Sepia effect (Add effect > Colour > Sepia): You can modify the degree of… er… “sepianess”, but that’s it. Changes will affect all the frames in the clip in the same way.
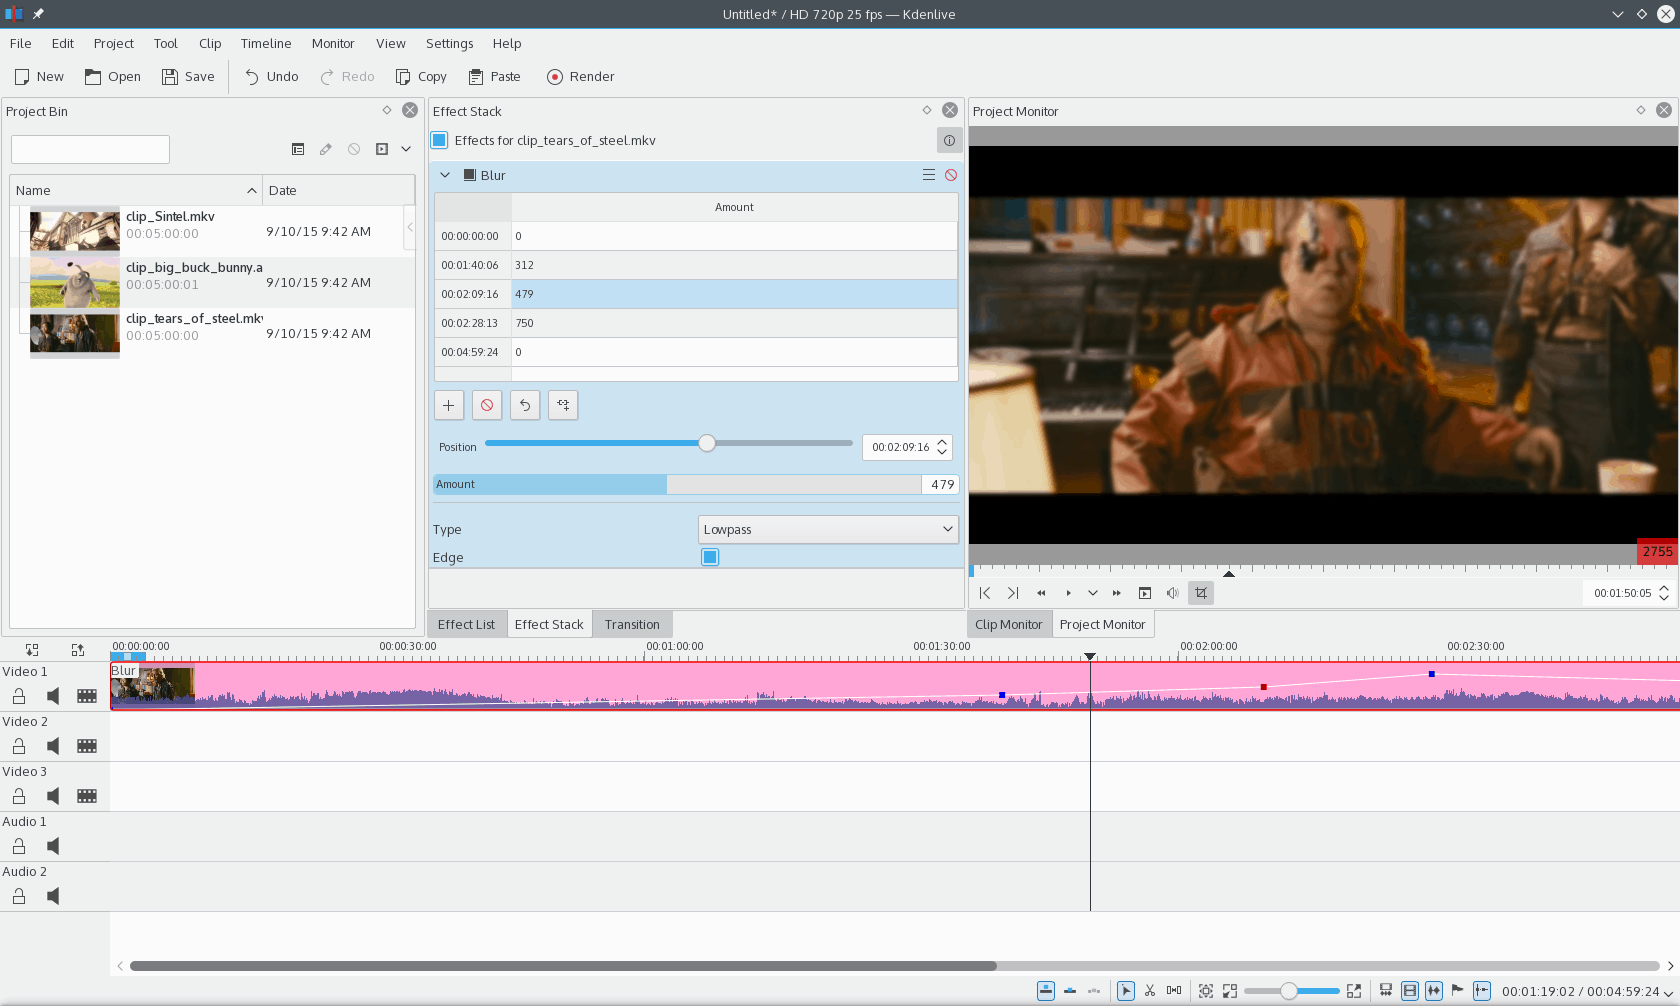
Some effects are keyframeable, allowing you to change the degree of the effect at different points within the clip. The white line on the video track shows to what degree the effect is applied and the little squares indicate the keyframes and can be dragged around.
The Blur effect (Add effect > Blur and hide > Blur), on the other hand, is keyframeable. This means you can set up a frame with certain values for the effect (the first keyframe) and then another one further on with another value (a second keyframe). You can have as many keyframes as you want, so you can have different degrees of blurriness at different points of the clip. Kdenlive also works out the intermediate values for the effect so transitioning from one set of values to another is done smoothly.
A word of warning: Although effects are cool and all, you CAN overdo them. Piling on effects is the newbie equivalent of using a bunch of different and unrelated fonts in a document when you first discover wordprocessing. You may think it looks cool, but it doesn’t.
Transitions
Although they are nice and clean, you don’t always want to move from one clip to another with a cut. Sometimes, you’ll want to fade or dissolve to a new scene. Often you will also want to superimpose images, like a watermark, or a text title, onto your moving images. All these things you achieve with transitions.
Say, for example, you want to superimpose the “The End” title you can see above onto your clip. Make sure your video clip is *not* in the top track, and drag out the title to the track immediately above it. Kdenlive will automatically create an Affine transition so the title’s alpha channel (the transparent pixels) are interpreted as transparent by the renderer and the underlying clip shows through.
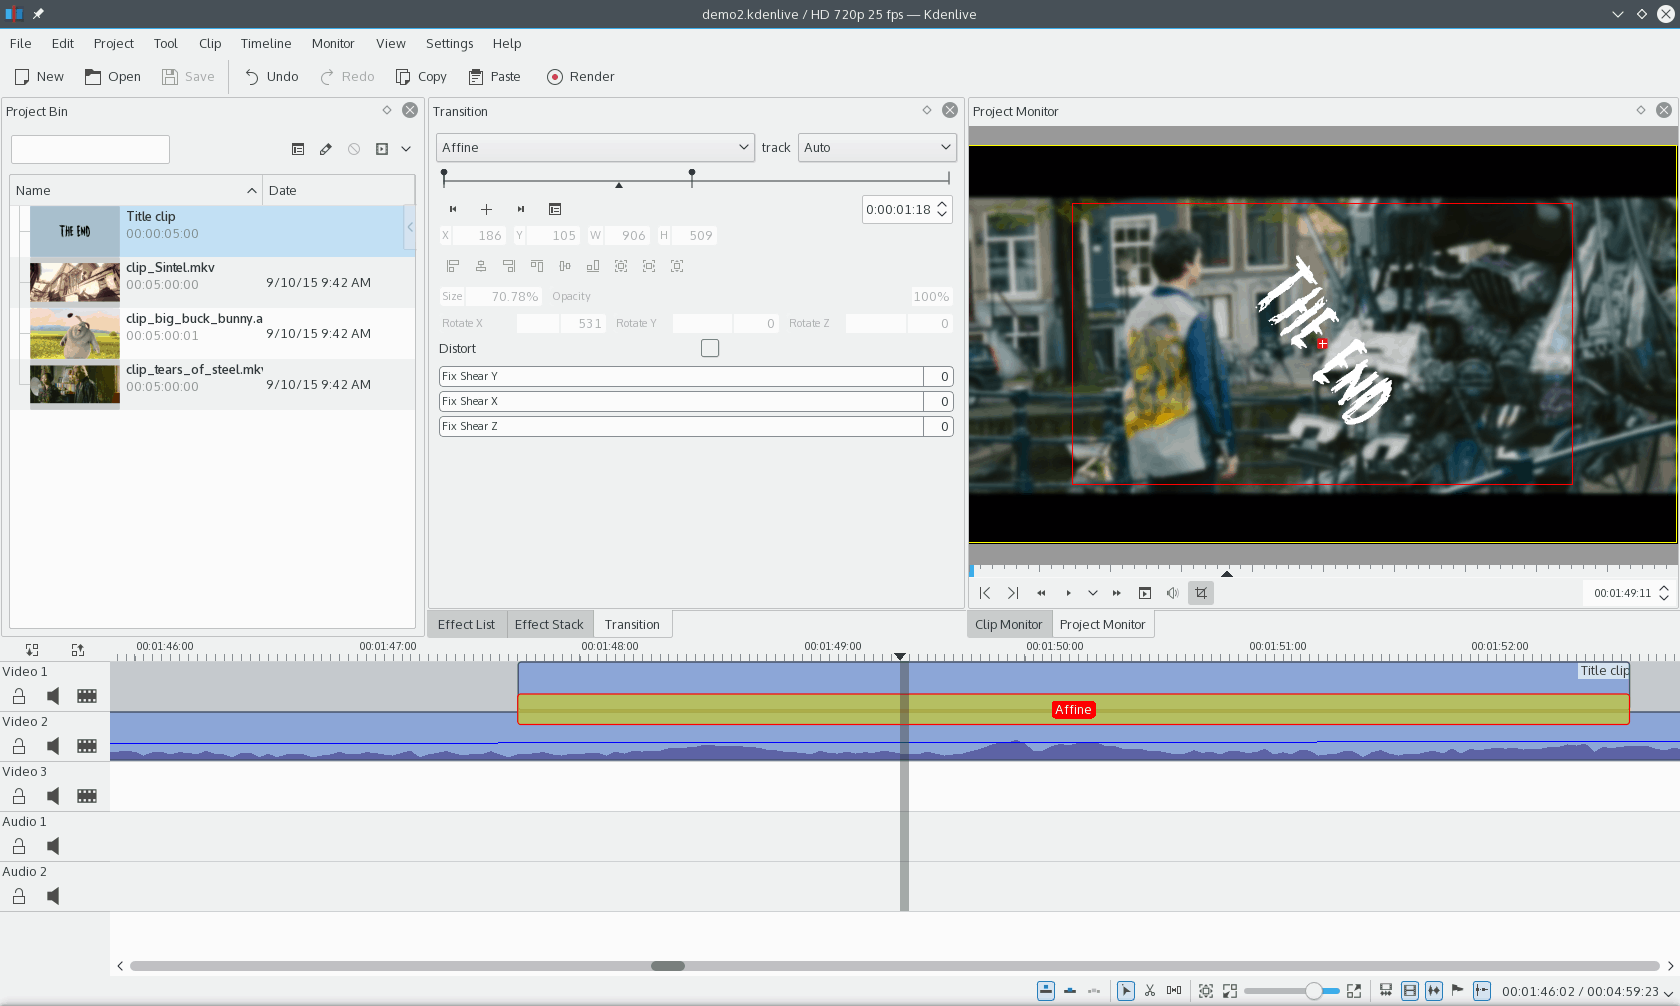
Transitions can be used to create titles and many are also keyframeable.
Transitions show up as yellow rectangles stuck between two tracks with a red title. As with clips, you can pick them up and move them around, grow or shrink them, and copy and paste them to new clips.
The really cool thing is that the Affine transition, just like the Blur effect, is keyframeable. This lets you animate the title, and have it fly in from the left, for example, or spin, or grow, or whatever you need.
Other uses of transitions are precisely to transition from one clip to another. The Slide transition (Add transition > Slide), for example, allows you to slide the clip on top in or out, to transition from or to the clip beneath it. You can choose whether to slide the top clip in from the left, right, top or bottom. You can also decide on the level of transparency of the clip at the beginning and the end of the transition.
Rendering
To create the final movie, you have to “render” it. This means all the clips, along with their effects and transitions, are melded into one video file that a multimedia player (such as VLC), or YouTube can play.
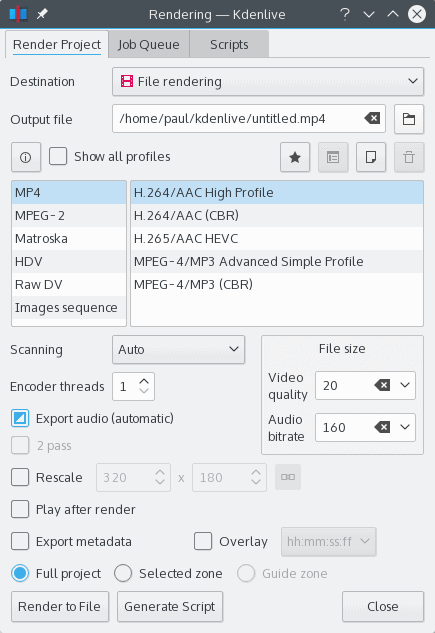
Render your project to create your final movie.
Press the Render button in the toolbar and the render dialogue will pop up. From here you can choose the format, size, quality and destination (as in where you want to store the movie file on your hard disk) of your film. You can also choose to Render to a File or Generate Script.
Rendering to a file does what it says on the box: Press it, wait a while as the fan on your laptop goes crazy. At the end of the process, voila: your movie is made.
Generating a script, however is far more interesting for large projects. Kdenlive is not only an editor, but it also comes with an independent renderer component, a component you can install by itself on a headless server, or even a render farm.
When you generate a script Kdenlive creates two files, an executable .sh script, and a .mlt script that contains instructions for the renderer. Ship those two bits off with your assets to the server, and let it do the work.
What Kdenlive is missing in the above scenario is a package option, an option that would automatically create a directory or an archive file (a tar or zip file) containing all the assets correctly linked up to the project. Currently you have to do the “packaging” yourself, i.e., you have to copy stuff by hand and relink them within the Kdenlive project.
Despite this shortcoming, the Generate Script option is still immensely useful.
As pointed out by Peter below, Kdenlive does have packaging capabilities. When you are done with your project, you can go to Project > Archive and select to create a tar archive or a compressed tar to save your work. You can then transport the archive file between installations. Kdenlive can open both an uncompressed and a compressed tar file directly.
Conclusion
Since I am not a professional videographer, it is hard for me to evaluate how far Kdenlive is along the line separating a “Tool for amateurs” from “The kind of application George Miller would use to cut the next Mad Max”. However, may I dare postulate that Kdenlive will probably satisfy 90% of the needs of 90% of the users 90% of the time? It is that good. And for the remaining 10% of 10% of 10%, you have other tools. As with the Free Software graphic suite made up by Inkscape, GIMP and Krita, different apps solve different problems. The developers gradually include filters and plugins so they can all work together.
One of Kdenlive’s main advantages is that it is simple and intuitive, while not being underpowered. Also many of the stability issues have been solved and it doesn’t crash half as much as it used to. This alone makes it preferable to the theoretically much more powerful, but mercurial Cinelerra. It is also substantially more complete and more feature-rich than OpenShot, its other contender on the other end of the spectrum.
I did say above Kdenlive is stable. Stability, however, is a relative term in complex programs like these, so remember good practices! Save your project as soon as you start and hit [Ctrl]+[S] often, at least once after every major change. But, then again, this is something you should do with every creative program you use anyway.
Cover Image: Old movie projector by Jean Scheijen for FreeImages.com
[sharedaddy]


https://userbase.kde.org/Kdenlive/Manual/Projects_and_Files/Archiving is kdenlive’s ‘package option’.
I have found that kdenlive is rock solid so long as you avoid the newer kdelive-15 branch, which should get better as it matures.
Wow! Thank you Peter! I did not realise this. I am amending the text to include this information.
No prob, great article, I didn’t realise you could just drag the preview window onto the timeline.
Great review. I’ve had to think about using a video editor lately. Kdenlive looks like the tool.